喜马拉雅xm文件解密逆向分析 [Electron]
前言
说点前言,但是我又不知道说啥了。
由于最近突然喜欢在做事情的时候开个有声小说,于是我就把喜马拉雅这个软件重新下载了下来,并小冲了一个会员。
我注意到喜马拉雅这个客户端同时具有下载的功能,小小的尝试了一下,发现下载下来的文件为.xm文件格式。这个格式属于一种加密的格式,除了喜马拉雅客户端之外都不能播放。
什么,加密的?这怎么能忍。
仅限于学习交流使用,本文作者不负任何其他责任
Disclaimer: Only used for educational purpose.
动态分析
Electron自带的参数可以很好的帮助我们对electron程序进行动态分析。
electron在运行的时候一般会有两个process。一个为main process,另外一个为render process
在调试这个程序的时候,主要需要调试的main process。 所以我们可以加上--enable-logging来显示main process中console.log的内容。
同时,我们也可以用--inspect=9000 + chrome v8 debugger 的方式进行调试。
在使用inspect的时候需要给main.prod.js加上一个patch,不然启动不了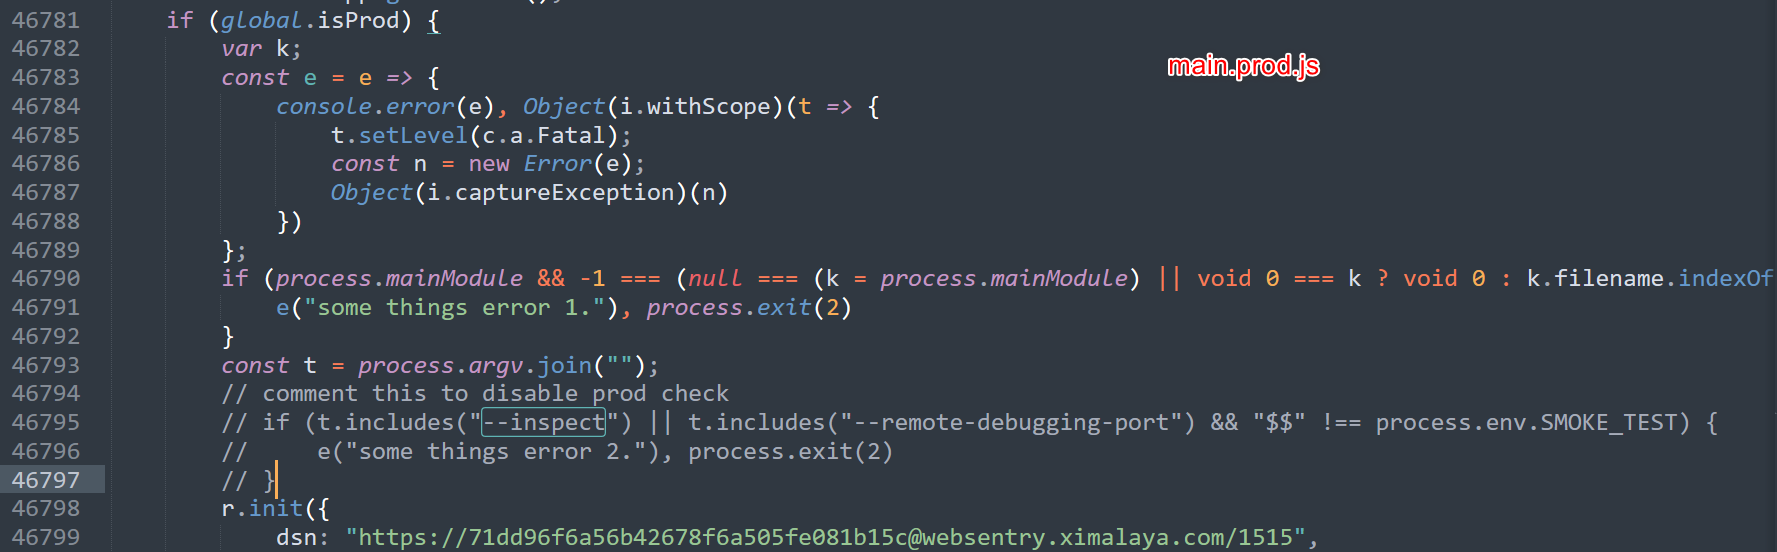
如果我们需要对 render process 进行调试,我们可以在代码中加上
1 | const { BrowserWindow } = require('electron') |
并重新打包app.asar。
当然,喜马拉雅app提供了另外一个flag --xmdebugger来启动render process的debugger

具体可以看 Reference Section
分析过程
首先来看一眼文件结构,ok,一眼electron,直接解压app.asar开破。
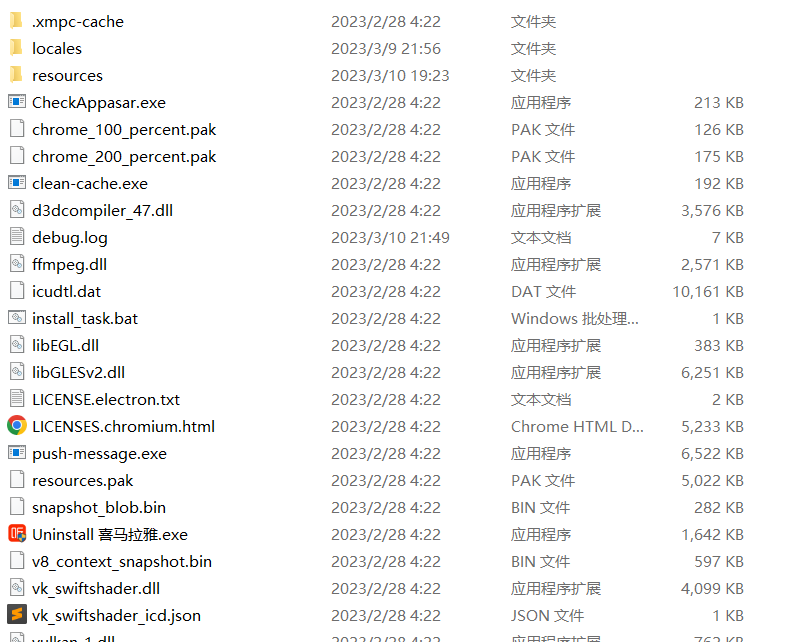
app.asar 在 resourses 目录下,解压之后发现了一堆文件。
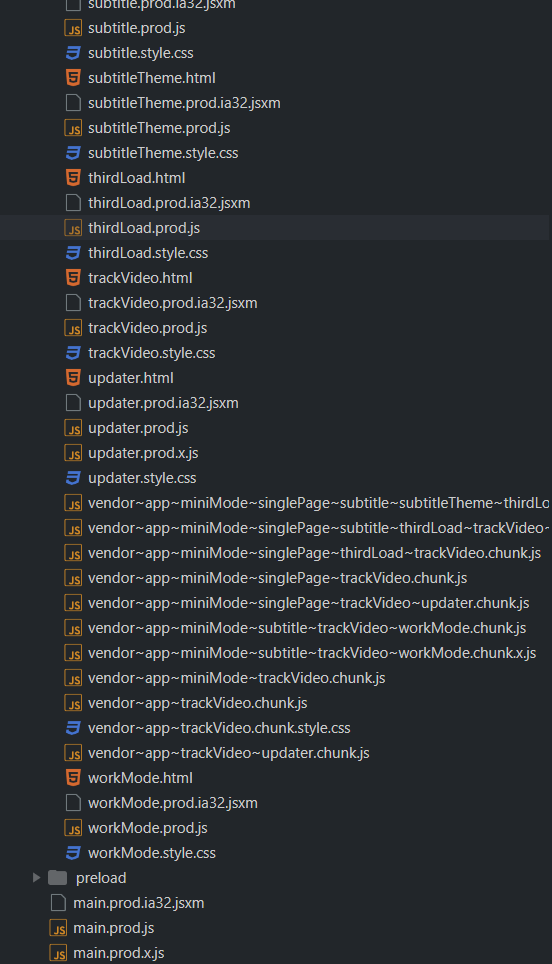
总之在经过一番寻找之后,我定位到了几个和解密加密有关的重要javascript文件。
24.chunk.js 以及 updater.chunk.js。(和加密解密完全无关的名字,这就是混淆么)
首先我们用js-beautify来格式化代码,不然代码在都在一行里分析起来太折磨了。
关于
js-beautify的安装使用可以参考js-beautify
updater.chunk.js
updater.chunk.js
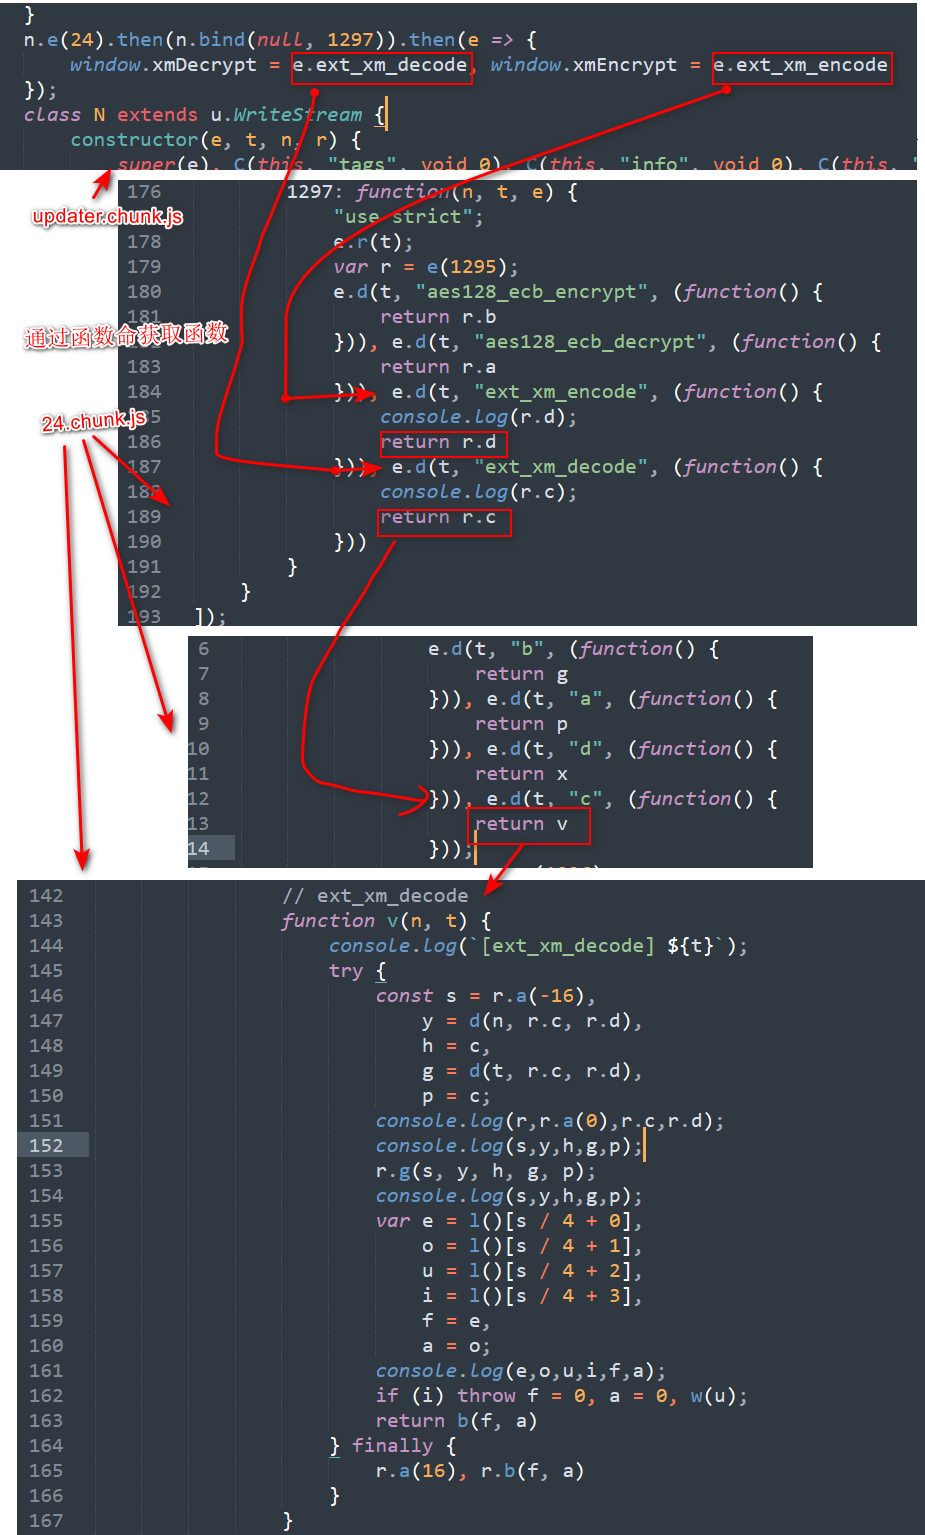
1 | n.e(24).then(n.bind(null, 1297)).then(e => { |
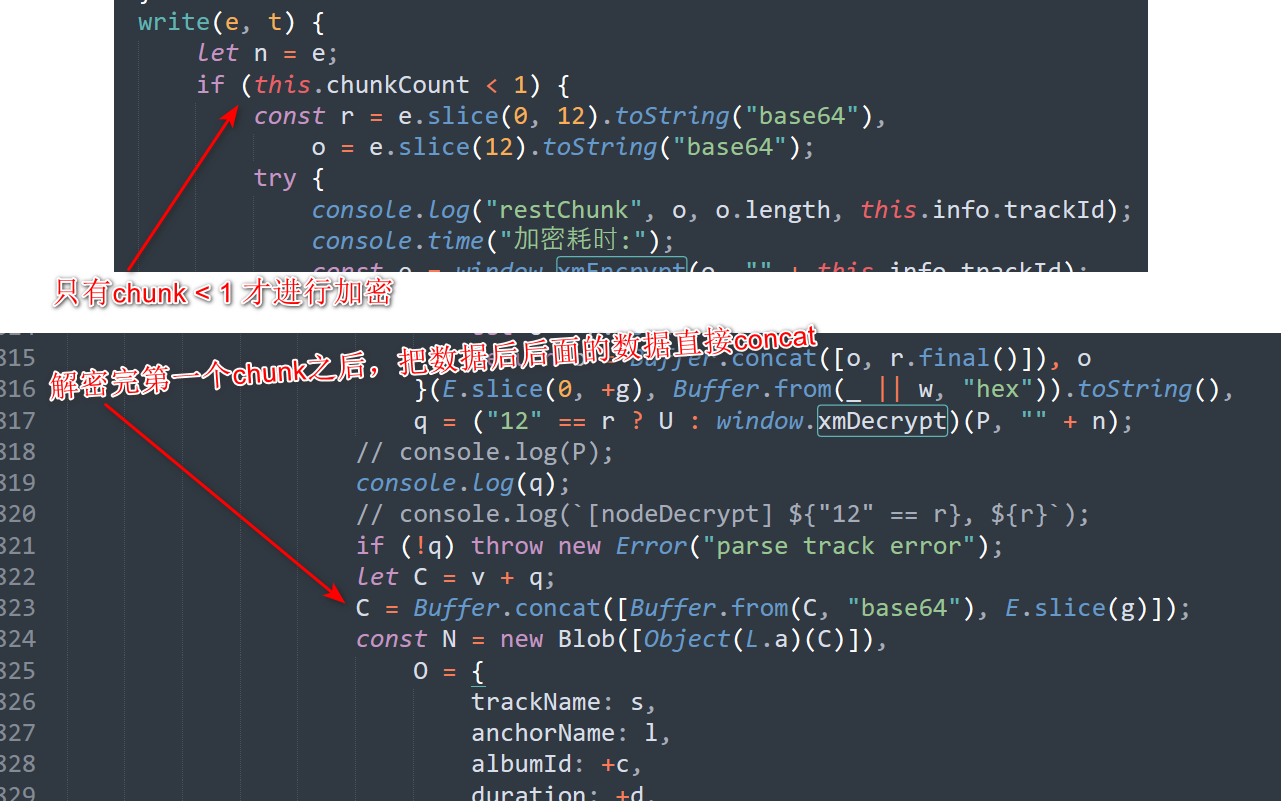
首先,从加密函数中可以看出,xm文件加密只加密了文件的第一个chunk,其余的chunk都是以明文储存的。
在解密函数也能看出这一点,在解密了以一个chunk的数据后,他直接把这个数据和接下来的数据concat在一起了,没有再做别的处理。
再来看看解密函数,解密的过程本身十分好懂

我们可以大致把解密的过程分为四个stage
Stage 0: 第一个stage就是读取ID3tag,来获取必要的信息。
通过getTagsFromBuffer和removeTagsFromBuffer这两个函数,我们可以推测出,喜马拉雅使用了node-id3这个开源库来读取文件头的id3 tags。
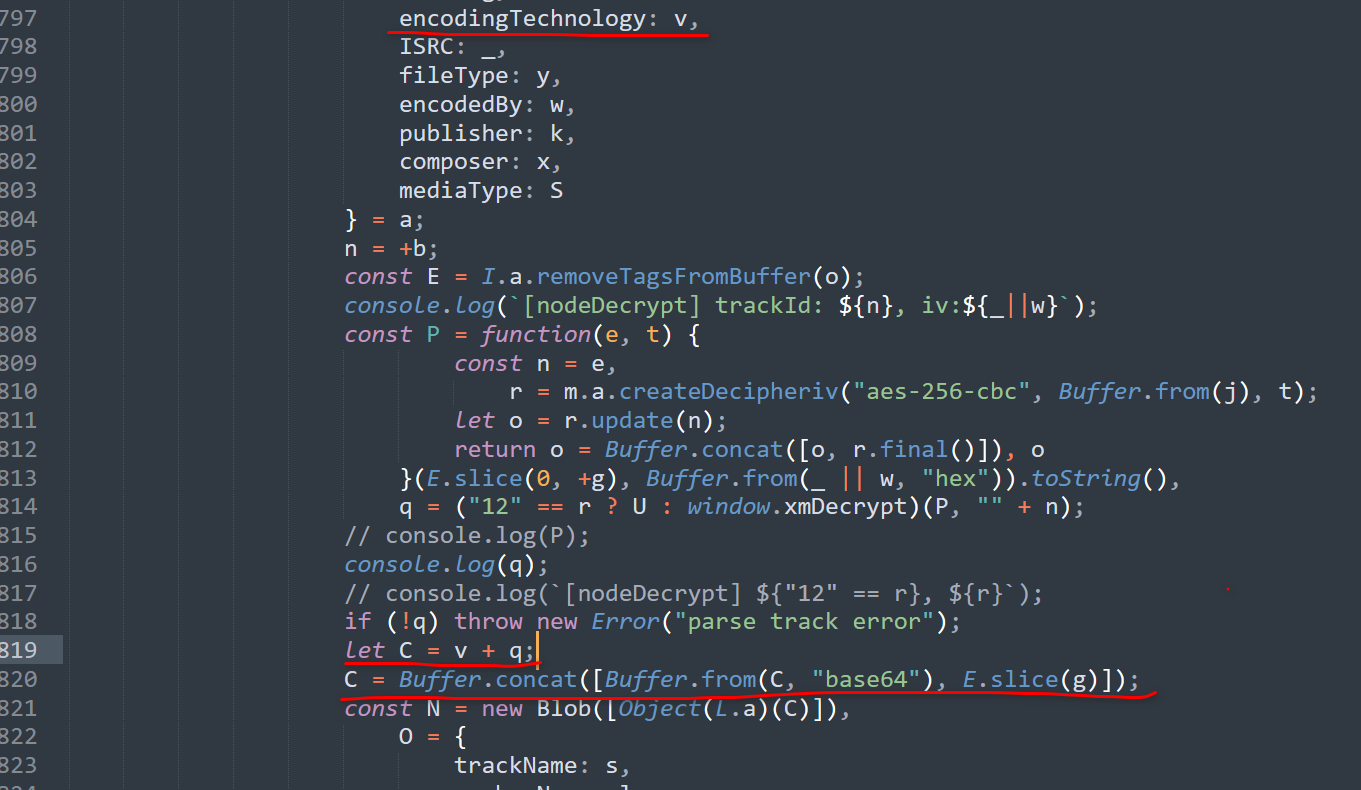
同时,观察后面的代码,我们也能发现这个解密函数使用了以下tag的值对数据进行解密。
trackNumber, size, encodingTechnology, ISR, encodedBy
在读取tag之后,解密函数会把tag数据从原始数据中删除,只保留数据部分。
Stage 1: aes-256-cbc。
首先通过id3 tag中的size值获得被加密的数据长度 (也就是第一个chunk的长度)。 用slice把这部分数据拿出来。
然后看ISRC和encodedby这两个值。获取其中不为空字符串的值。把这个值以16进制进行读取,可以获得一个byte array。
接下来就可以对这部分加密数据进行解密了,把这个byte array作为iv,加上一个固定的key,用aes-256-cbc解密这个数据,可以获取到一段base64编码的数据。
这个数据将作为第三个stage的数据,进行进一步解密。
完成stage 1的解密之后,这个解密函数会判断decryptVersion是多少。如果decryptVersion为"12"那么就使用U这个解密函数,不然则使用window.xmDecrypt这个解密函数。
根据我的试验,最新版中所有的decryptVersion都不等于"12"(可能会有例外,但我遇到的都不是"12")。
在获得对应的函数之后,解密函数会把上一步中获得数据以及tracknumber作为两个字符串参数传入,进行进一步的处理。
那么xmDecrypt在哪里呢,我们需要看到24.chunk.js
24.chunk.js
24.chunk.js
1 | (window.webpackJsonp = window.webpackJsonp || []).push([ |
通过一系列的函数创建与赋值,我们可以发现window.xmDecrypt其实就是24.chunk.js中的v函数
Js部分
接下来,来分析以下这个v函数。
1 | var r = e(1296); |
使用动态调试,并输出这部分的值可以帮助你更好的了解这个函数在干什么
我这里把和v相关的函数都单独拿出来了。
除了一个谜一样的变量v之外,其他都比较好理解。一个个来看就行
function u(): 懒加载,把r.i.buffer作为Uint8Array (1 byte array) 返回
function l(): 懒加载,把r.i.buffer作为Uint32Array (4 byte array) 返回
function b(startIdex, length): 获取byte array中的一段值并将这些数据以utf-8的形式解码。 也就是等效于:
(new TextDecoder()).decode(u().subarray(startIdex,startIdex+length))。
function d(text,allocator_func,func_1): 简单来说,把可显示的text值(也就是英文+数字+符号)写入到r.i.buffer,并返回写入的地址(offset)和写入的长度(length)
当然这个函数只返回了o也就是写入地址的偏移。但是他把一个另外一个变量c设置了为了写入的长度,并在之后被读取。
function v(n, t):
之前我们提到,n,t分别为上一个stage中的数据以及tracknumber
大概的伪代码可以参考下面
1 | function xm_decode(data, tracknumber) |
那么r是什么
一路追踪,我们发现r实际上是一个WebAssembly的程序,那些奇怪的东西都是wasm里的导出函数和数据。
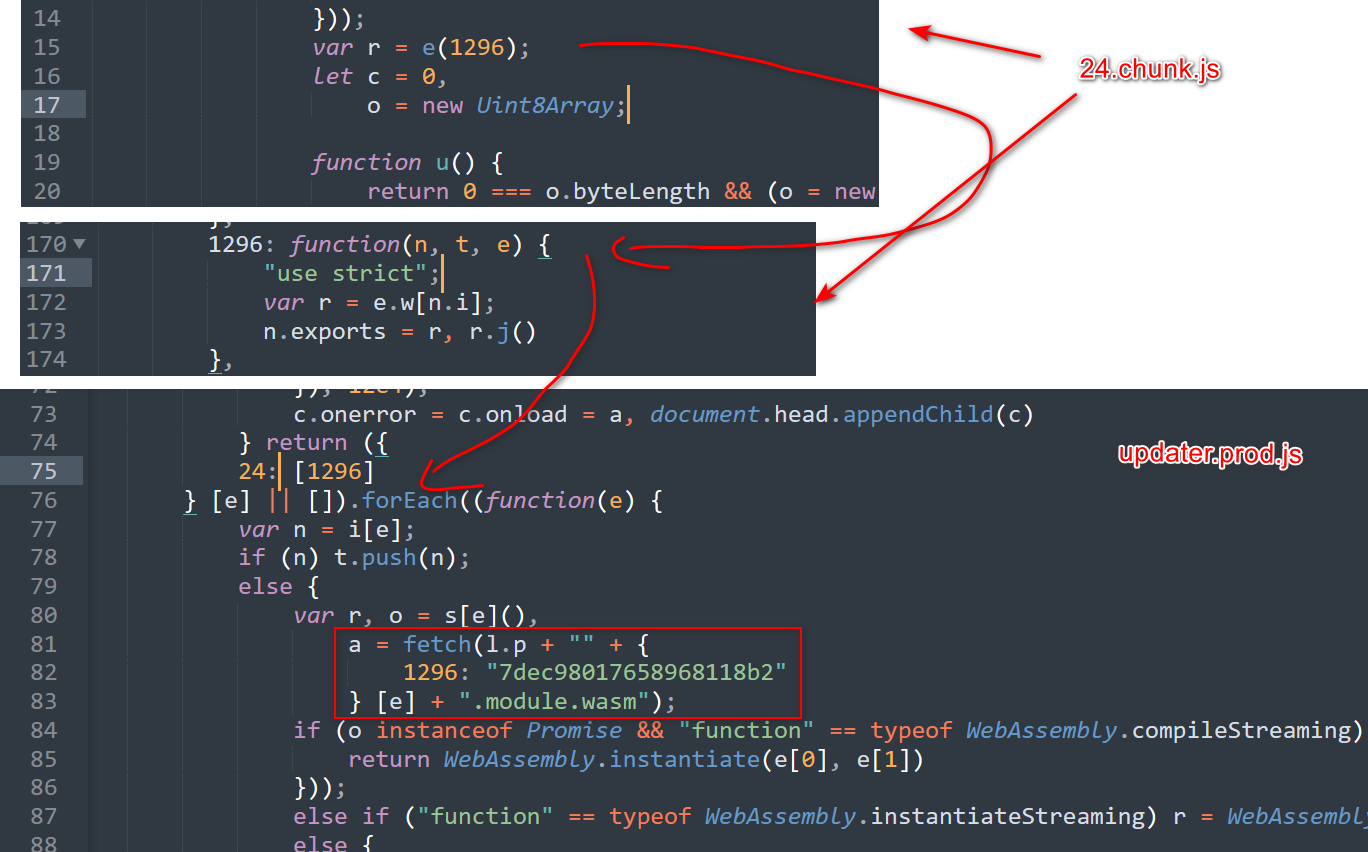
到这里,我们已经不需要继续对wasm进行逆向了,我们可以直接使用一个wasm runtime直接调用wasm里的函数来进行解密(我也是这么做的)。
WebAssembly 部分
关于反编译WebAssembly,我们可以用wabt这个WebAssembly工具集
具体使用方法以及安装教程参考README.md
1 | wasm-decompile 7dec98017658968118b2.module.wasm -o 7dec98017658968118b2.module.dcmp |
i: 就是一个memory
a: 减少栈顶值并返回
c: malloc
g: 奇妙的加密函数
并把返回值(data_offset,length,?,status)写在栈中
1 | // r.i.buffer memory |
合起来分析
Stage 2: xmDecrypt
输入上一个stage中的数据以及tracknumber,返回一个解码后的utf字符串
通过WebAssembly runtime解码
Stage 3:
stage 3就比较简单了,把上一步中解码后的数据和tag中的encodingTechnology加在一起,并用base64解码
最后把解码后的数据和剩下的数据连接起来就可以了。
解密脚本
xm_encryptor.wasm 请自行提取
注意: size这个ID3 tag只在v2.3中才有
1 | ''' |